


For detailed information, other images and documents, please select individual articles from the following table.


Terrace drilling template
The drilling template guarantees a clean and absolutely uniform screw pattern

Register now and access more than 125,000 products
Variants
Register now and access more than 125,000 products
- Exact positioning of drill holes in terrace boards
- Precise alignment of drill holes in straight lines
- Simply align using the screws of the last board
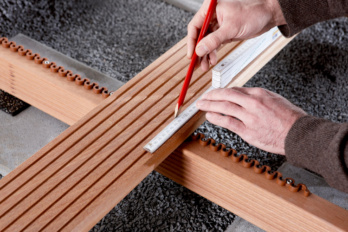
Mark the screw positions on the top of the board. The hole should not be in a groove or notch on the board.

Place the drilling template on the floorboards and use the side notch to adjust the rear drill bushing exactly to the corresponding marking line.
In the same way, adjust the front drill bushing to the second line using the side adjustment notch. Then place the floorings exactly on the wooden beams. Note: Use the long holes on the first board
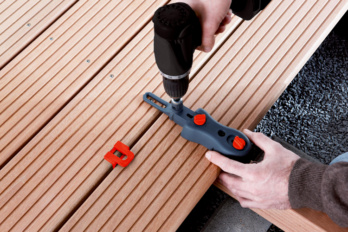
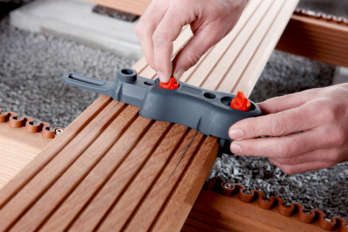
Insert a spacer between the boards every 80 cm. Use the tab to align the drilling template with the existing row of screws and drill the screw holes briefly.
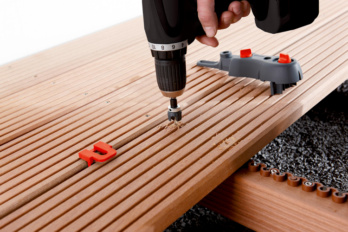
Then drill and lower holes without drilling template. The lowering depth can be precisely adjusted with the push-on sink.
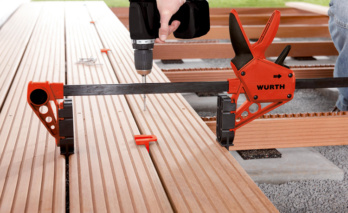
If all holes are drilled in the entire floorboard, screw the floorboards in the center onto the wooden beams. With the terrace-building clamp, even curved floorboards can be straight drawn without any problems.
For board widths of 100 - 150 mm
Select RAL-colour code
!! NOTE: On-screen visualisation of the colour differs from real colour shade!!